Hummingbird feeders provide essential fuel for these vibrant, quick-moving birds. Opening one may seem intimidating for first-time users, but it’s quite easy with the proper guidance.
This article will cover the basics of how to open hummingbird feeder, ensuring it’s clean and safe, and preparing it for these delightful visitors.
Understanding how hummingbird feeders work and the proper maintenance required is critical to attracting these beautiful creatures to your backyard. We’ll walk you through the process of setting up a feeder correctly, from the initial unboxing to refilling with nectar.
We’ll also touch on some underlying concepts, such as managing the nectar solution and rehanging the feeder.
Learning the best practices for maintaining your hummingbird feeder will bring more enjoyment to both you and your new avian friends.
By following the steps we provide and adhering to the cleaning guidelines, you’ll create a delightful experience for both you and the hummingbirds that visit your feeder.
Key Takeaways
- Opening a hummingbird feeder is simple with the right guidance
- Proper maintenance ensures a clean and safe environment for hummingbirds
- Learning best practices attracts more hummingbirds to your feeder
How to Open Hummingbird Feeder
Types of Hummingbird Feeders
As a hummingbird enthusiast, I’m always looking to provide my feathered friends with the best possible feeding experience.
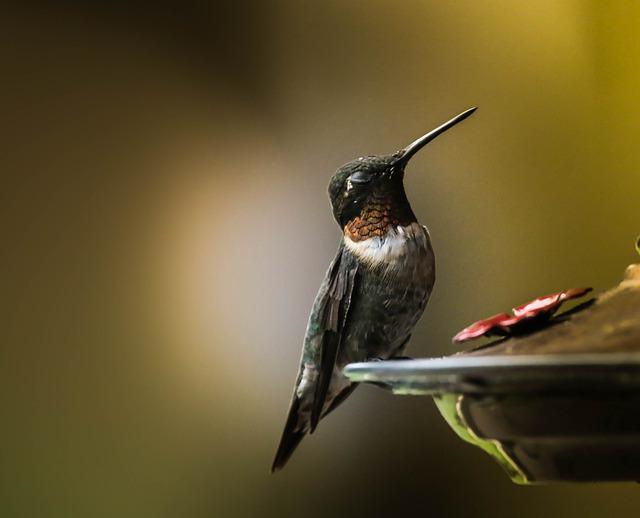
There are three primary types of hummingbird feeders available: bottle feeders, saucer feeders, and tube feeders.
- Bottle feeders: I find that these feeders offer an attractive design and are perfect for containing large amounts of nectar. They consist of a bottle-like reservoir with feeding ports on the base where hummingbirds can access the nectar.
- Saucer feeders: Saucer feeders are typically shallower and wider than bottle feeders. They have a dish-like base that holds nectar with feeding ports on top. If cleaning and refilling the feeder is a priority, this is a perfect choice for me as they are generally easier to maintain.
- Tube feeders: These feeders are designed with narrow tubes to hold the nectar and mimic the natural elongated shape of flower blossoms. They are suitable for those who appreciate a more modern aesthetic but may require a more diligent cleaning regimen.
Understanding the Parts
To ensure that I make the most of my hummingbird feeder, it’s essential to become familiar with the various feeder parts.
I’ve learned that most feeders have some common components, regardless of their model or type:
- Reservoir: This is where the nectar solution is stored. Depending on the type, it can be a bottle, saucer, or tube.
- Feeding ports: These are the openings through which hummingbirds access the nectar. Some feeders also come with flower-shaped feeding ports to mimic the birds’ natural feeding environment.
- Perches: While not always present, perches can provide a resting spot for hummingbirds as they feed. They can be especially beneficial in attracting less dominant or shyer birds.
- Ant moats: An ant moat is a handy addition because it helps keep pesky ants away from the nectar. They’re typically filled with water, creating a barrier that ants cannot cross to get to the nectar.
Understanding these components allows me to make informed decisions about the type of hummingbird feeder that meets my needs and the needs of the hummingbirds visiting my yard.
Another Interesting Read: When Should I Take Down My Hummingbird Feeders?
Preparation for Opening
Tools Required
Before opening your hummingbird feeder, it’s crucial to gather all the necessary tools. This way, you won’t have to stop mid-task to search for a missing item.
Here’s a list of required tools:
- Pliers: Helpful for loosening tight parts and removing stuck pieces.
- Screwdriver: This could be needed for unscrewing the base, depending on the feeder model.
- Gloves: Wearing gloves can offer protection from sticky residue and sharp edges.
Safety Precautions
To avoid any potential accidents during the process, follow these safety precautions:
- Wear gloves: Your hands should be protected from possible spills and sharp objects.
- Work in a well-ventilated area: Hummingbird nectar can be sticky and may contain sugar, which can attract insects. To minimize this issue, make sure your workspace is well-ventilated.
- Keep children and pets away: To avoid any disturbances or accidents, ensure that children and pets are at a safe distance while you work on the feeder.
- Handle fragile parts with care: Some parts of the feeder may be delicate, like the glass reservoir or plastic flowers. Take extra care when handling these components to avoid breakage.
By preparing with the right tools and following necessary safety precautions, you’ll be ready to open your hummingbird feeder confidently and efficiently.
Steps to Open Hummingbird Feeder

Unscrewing the Lid
The first step in opening a hummingbird feeder is to remove the lid. I start by gripping the lid tightly and turning it counterclockwise. Sometimes, it might be a bit tough to unscrew, so using a cloth or a rubber grip to help with traction can be helpful.
If the lid is still difficult to turn, I grab a screwdriver to gently pry it open by inserting it under the edge of the lid and gently twisting. When dealing with a more stubborn lid, it is important to be cautious so as not to damage the feeder.
Detaching the Base
Once the lid is unscrewed, I can move on to detaching the base. To do this, I firmly hold the top part of the feeder with one hand while using my other hand to twist the base counterclockwise, just like with the lid. If the base doesn’t come off easily, I gently rock it side to side while continuing to twist.
With both parts detached, my hummingbird feeder is now open and ready to be cleaned, refilled, or stored. Remembering these simple steps will make opening any hummingbird feeder a breeze.
Feeder Cleaning Requirements
Cleaning Process
I always make sure to clean the hummingbird feeder every three to five days, as it prevents the growth of mold and harmful bacteria. Cleaning the feeder ensures the birds’ health and encourages more frequent visits.
When I start cleaning, I firstly prepare a solution of warm soapy water using a mild soap. I then take the feeder apart, making it easier to clean each component thoroughly.
To effectively remove all residue and contaminants, I use a cleaning brush specifically designed for hummingbird feeders. These brushes come in handy for cleaning those tiny ports and hard-to-reach spots. After scrubbing the feeder, I rinse it well with fresh water, ensuring all soap residues are gone.
Finally, I leave it to air-dry before reassembling and refilling with fresh nectar.
Preventing Contamination
Preventing contamination is equally crucial as cleaning the feeder. I follow these steps:
- Monitor Nectar: I check the nectar level daily, as low levels can promote bacteria growth. If it becomes cloudy or discolored, I replace it immediately.
- Avoid Direct Sunlight: I try to hang the feeder in a shaded area, as direct sunlight can cause the nectar to spoil faster.
- Regular Cleanings: By maintaining a consistent cleaning schedule, I significantly reduce the chances of contamination.
- No Overfilling: I only fill the feeder with enough nectar for a few days to avoid spoilage and minimize waste.
By following these steps, I ensure my hummingbird feeder remains clean, preventing contamination and providing a safe and healthy environment for the birds.
Understanding Nectar Solution
Recipe and Ingredients
To create a nectar solution for hummingbirds, it is essential to use the proper ingredients and techniques. The primary ingredient in nectar is sugar water. I recommend using white granulated sugar, as it closely resembles the natural sucrose found in flower nectar that hummingbirds consume in the wild.
The best recipe for a nectar solution is:
- 4 parts water: Boil the water to help dissolve the sugar and reduce bacterial growth.
- 1 part white granulated sugar: This is the perfect ratio to mimic natural nectar.
After boiling the water, simply mix in the appropriate amount of sugar and let it cool before filling the feeder. It is important not to add any red dye, as it may be harmful to hummingbirds.
Problems and Solutions
When using homemade nectar, some potential problems may arise:
- Fermentation: Over time, the nectar may ferment, which may not be healthy for hummingbirds to consume. To avoid this issue, I recommend checking the nectar daily and refilling the feeder with a fresh batch every 2-3 days, more often in hot weather.
- Mold and Bacteria: Since nectar is a sugar-based solution, it may attract bacteria and mold. To prevent this, clean the feeder thoroughly with a mild bleach solution every time you refill it. Rinse it well to ensure no bleach residue remains.
- Pests: At times, ants or other insects may be attracted to the sweet nectar. To prevent this, consider using ant guards or ant moats.
Understanding the proper nectar solution recipe, ingredients, and potential issues can ensure a safe and attractive environment for hummingbirds to visit and enjoy.
Preparation for Refilling
Avoiding Overfilling
When I refill my hummingbird feeder, I make sure to avoid overfilling as it can lead to spills, wasted nectar, and attract insects.
To ensure I fill the feeder without spilling, I follow these steps:
- I carefully measure the nectar to match the feeder’s capacity.
- I position the feeder horizontally to keep the feeding ports closed while filling.
- As I pour the nectar, I keep an eye on the level, stopping just below the feeding ports.
By following these steps, I can reduce the chances of overfilling and make my refilling process efficient.
Securing the Feeder Parts
While handling a bottom-fill hummingbird feeder, it is essential to secure all the parts before hanging it back up.
Here’s how I ensure all the components are tightly fastened and secure during the refilling process:
- After filling the feeder with nectar, I tightly screw the base back onto the reservoir.
- I inspect the feeding ports to ensure they are properly sealed and free of any debris.
- I double-check for any loose parts that may cause leaks or allow insects entry.
By securing the feeder parts, I can confidently hang my feeder back up and provide a safe, clean feeding environment for my hummingbird visitors.
Steps to Hang Hummingbird Feeder
Choosing the Right Placement
In order to hang my hummingbird feeder, I first need to choose the right placement for it. To attract more hummingbirds, it’s essential to find a location that meets their needs. I should pick a well-lit area where they can easily spot the feeder.
A sunny area would be a great choice as it facilitates nectar consumption for the birds by keeping it warm. However, ensuring the feeder is in a sheltered spot where the hummingbirds feel safe from predators is a priority.
Reattaching and Setup
Once I’ve selected the ideal spot, I should focus on reattaching and setting up my hummingbird feeder. Firstly, if the feeder isn’t pre-assembled, I need to put it together following the manufacturer’s instructions.
Next, I’ll need to prepare the nectar solution. It’s recommended to use a 4:1 ratio of water to sugar.
After preparing the nectar, I can fill the hummingbird feeder with it. Now, I need to hang the feeder securely using a bracket or another hanging support. Making sure it is properly attached and stable is crucial for keeping the hummingbirds safe and encouraging them to return.
Lastly, I should periodically clean the feeder and replace the nectar to keep it fresh, as this is essential for maintaining the health of the visiting hummingbirds.
Attracting Hummingbirds to Feeder

Color and Design Influence
I have observed that the color red is highly attractive to hummingbirds. In order to successfully attract these beautiful birds to my feeder, I always choose a feeder with a red base or red flowers.
Additionally, decorative designs such as bright flowers or patterns on the feeder can help catch the attention of hummingbirds as they pass by.
Providing perches near the feeder is also a great idea when I want to attract more hummingbirds. These small birds expend a lot of energy flying and feeding, so having a place for them to rest can be beneficial.
I make sure to place the perches at varying distances from the feeder to give the birds some space from one another.
Tips and Techniques
- Keep the feeder clean: I make sure to always keep my hummingbird feeder clean, as an unclean feeder can deter hummingbirds from visiting.
- Refill nectar regularly: Ensuring that the nectar levels in the feeder are consistently full will show the hummingbirds that it is a reliable food source, and they’ll be more likely to visit it frequently.
- Position feeder near flowers: I like to place my feeder near flowering plants or trees, as this can help to draw in the hummingbirds that are already attracted to the flowers.
- Limit insect access: I try to choose and position my hummingbird feeder in a way that makes it difficult for insects such as ants and bees to access it. Insects can deter hummingbirds from using the feeder.
- Sightlines: To create an inviting environment, I ensure that there is a clear sightline between the feeder and the surrounding environment. Hummingbirds are more likely to visit if they can spot the feeder from a distance.
By implementing these strategies, I’ve found that I’m able to attract hummingbirds to my feeder more effectively. Paying attention to the color and design of the feeder and following these helpful techniques can make all the difference in providing an enjoyable experience for both the birds and myself.
Frequently Asked Questions
How do I fill a Perky-Pet hummingbird feeder?
Filling a Perky-Pet hummingbird feeder is simple and easy. First, unscrew the base of the feeder and remove it. Make sure to clean any remaining nectar inside the bottle. Then, mix 1 part sugar with 4 parts water to create a nectar solution.
Fill the feeder with this solution, reattach the base, and securely tighten it. Now your Perky-Pet hummingbird feeder is ready for use.
What is the best way to open a glass hummingbird feeder?
To open a glass hummingbird feeder, first, ensure the feeder is empty and clean. Hold the feeder by the top hook or hanger, and grip the base with your other hand. Twist the base counter-clockwise to loosen and remove it.
Avoid applying excessive force, which could cause the glass to break.
How do I ensure my hummingbird feeder is working properly?
To make sure your hummingbird feeder is working well, clean it regularly and replace the nectar every few days. Check for leaks, clogs, or damage to any parts and fix or replace them as necessary.
Watch for the feeder attracting hummingbirds; if you don’t see any, try relocating it to a more open area.
Are bottom-fill hummingbird feeders easy to open?
Yes, bottom-fill hummingbird feeders are usually easy to open. Simply hold the feeder by the hanger and turn the bottom part in a counter-clockwise direction. Make sure to support the feeder while opening it to avoid spilling any nectar.
Do hummingbird feeders need to be in an open area?
Placing your hummingbird feeder in an open area is beneficial, as it allows the birds to spot it easily and approach without obstructions. Position the feeder at least 10-15 feet away from trees, bushes, or other structures and within your sight so you can enjoy their visits.
Why might my hummingbird feeder be stuck shut?
A hummingbird feeder may become stuck if sugar solutions over time dry up on the feeder’s threads or its parts become over-tightened. Ensure to clean the feeder thoroughly during refills, and when attaching parts, don’t overtighten them.
